Whether you are diving with a large camera rig or a point and shoot, compact style camera it’s imperative that you care for it correctly if you want to avoid leaks and flooding – and if you want it to last.
In this Underwater Photography Blog we take you from before the first photography dive of your trip to after the last dive of your trip. Read on for step by step advice on how to care for your underwater photography equipment….
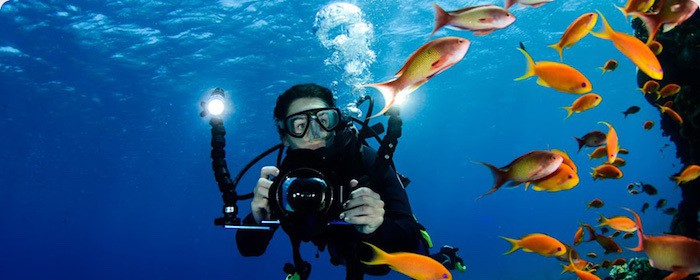
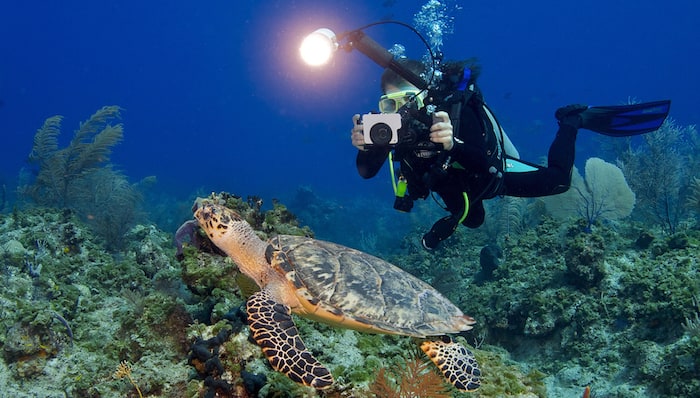
Proper camera and housing maintenance is essential if you want your equipment to last
So you arrive at your destination with your camera gear (new or used) and of course you want to get out as soon as possible and start taking images underwater. Remember that with new or used equipment it might not have been used in a while – or if at all, so there are a few steps to take before you start taking pictures.
Step 1 – Camera Care Before the First Underwater Photography Dive

Remove the housing O-ring using a blunt object such as a credit card
Remove the O-ring from your housing (if it is in place) by using a blunt object such as the rounded corner of a credit card. Do not use knives, scissors etc to remove the O-ring as you will risk damaging the rubber. Once the O-ring is removed wipe clean the groove in which it sits. This can be done with tissue but a lint free cloth is best. Do this under a bright light such as a reading light or desk lamp and check the groove for any grit, sand or even hair and remove it. Once you are sure the groove is clean you can move onto the O-ring. Using your index finger and thumb, pinch the O-ring and slide your grip all the way around it, feeling for grit or other foreign matter. Doing this with a tissue is good as you’ll be removing matter as you go.
Once the O-ring is clean and smooth, apply a small amount of silicone grease along the entire length of the O-ring, and place it into it’s correct place on the housing. Note that you are only using a small amount of silicone grease to keep the O-ring in good condition, its purpose is not to “make the seal”! The seal is actually made by the O-ring being forced to expand in the groove by the water pressure, so its important that the O-ring is looked after.
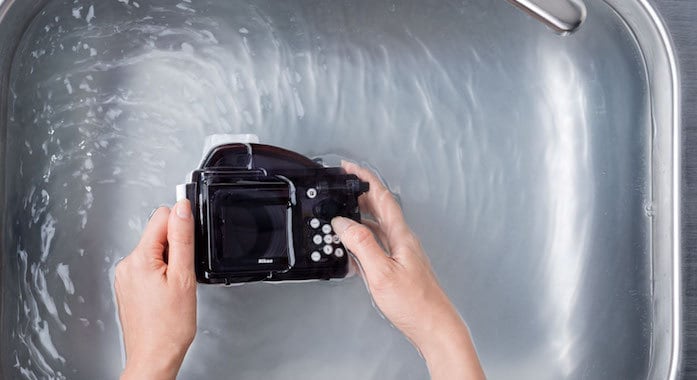
Take a piece of kitchen roll or tissue and fold it into a small square. Place it into the housing and seal it shut. Place the housing in a wash tank and check for bubbles. If no bubbles appear you are safe to take your housing on your first dive – please note, we did not place the camera in the housing. You are diving with only tissue inside.

A clean, lubricated O-ring will prevent leaks and floods
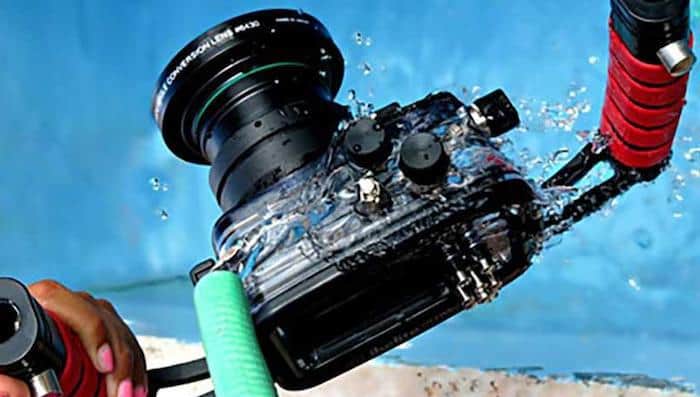
When you return from the dive check for any visible droplets of water inside the housing. Rinse the housing thoroughly in fresh water and towel dry or dry with an air gun if one is available.
Open the housing and check that the tissue is still dry. If your housing leaked on this first dive, at least your camera was not a victim! If the tissue is dry you are good to go!
Thoroughly rinse your camera housing after diving and towel dry or use an airgun (if available)
Step 2: Maintenance for Underwater Photography Equipment During Your Trip
Prepare your housing and O-ring as you did in step 1. This time you will place the camera in the housing too. Most cameras do not sit exactly on the bottom of the housing – there is a small space between the bottom of the camera and the housing. Take a single square of tissue and neatly fold into a small enough square (or rectangle) to insert into this space. A sachet of silica gel can also be used instead. The idea is that if there is a small leak you can hold the housing upright and the water droplets will run down to the bottom and be absorbed by the tissue instead of being “loose” inside the housing with your camera.

Have your camera passed to you in the water and hand it up to the crew before boarding the boat
After Diving: After every single dive make sure you place your camera and housing into a rinse tank / or bucket of fresh water. Running water may also be used and be sure to pay attention to around the seal and buttons to ensure no salt residue remains on the housing. Towel dry or blow dry the housing prior to opening. Once the camera has been removed, immediately close the housing again to avoid any dust or other matter accumulating on the O-ring or around the seal.
Before every dive: Remove the O-ring and clean the groove and O-ring as in step 1. Re-apply silicone gel to the O-ring prior to replacing back on the housing. Insert the camera and tissue / silica gel sachet and seal. Test the seal in a rinse tank or bucket and check for bubbles before the dive.
Hold your camera in water to check for bubbles prior to each dive
Multi-Dive Trips: If you are going out on the boat for a two dive trip, check to see if there is a bucket of fresh water on the boat in which to place your camera between dives. This will prevent dry salt residue from forming and keep your camera cool. If there is no bucket, take a bottle of drinking water to rinse the housing and store it in a safe, shaded area on the boat between dives.
Step 3: Underwater Photography Equipment Care After Your Last Dive
Rinse your camera thoroughly after your last dive. Use running water over all buttons, dials and controls to ensure there are no salt crystals remaining. Dry thoroughly prior to opening the housing and removing your camera.
Remove the main O-ring with a blunt instrument and place to one side. Clean the groove in which the O-ring sits with a lint free cloth to ensure there is no grit, sand, salt, hair or foreign matter. Use a lint free cloth to wipe around the O-ring ensuring it is clean. Take a small amount of silicone grease and rub this into the O-ring before folding it into a figure of 8 shape and placing in a zip-lock bag. The grease will prevent the O-ring from drying out and cracking when not in use. The zip-lock bag will also prevent the O-ring from being exposed to the elements. Place the zip-lock bag with the O-ring inside your housing and seal it closed. This will prevent your O-ring and housing from becoming separated in the future. Store your housing in a cool, safe place until your next trip!
Enjoy years of dives with well maintained camera equipment
By following these simple steps and keeping your housing clean, lubricated and well looked after you will increase its life span and will be able to take pictures with it for many dives to come. Your camera will thank you for your services when it returns from dive after dive without any issues!
What is a Good Location for Underwater Photography?
Did you know that the Lembeh Strait is an underwater Photographer’s paradise and one of the most sought after diving destinations for amateurs and pro’s alike? At Two Fish Lembeh we are geared towards underwater photographers of all levels. Our two managers both shoot with compacts and love to share their experience of the critters and photographing in the Lembeh Strait with guests. If you’d like to improve your compact camera imaging; spend time with other keen compact shooters; and enjoy world class dives with rare and unusual marine life, Lembeh must be on your bucket list.
!!Check out our latest SPECIAL OFFERS here!!!

The Lembeh Strait is just a short boat and car transfer from Two Fish Divers Bunaken.
Why not combine your muck diving in Lembeh with the phenomenal reef and wall dives of the Bunaken Marine Park where you’ll lose count of the turtles you see on each dive!
Want to Dive and SAVE?
Check Out Our Two Fish Special Offers
Are you planning to dive Bali, South Lombok or Gili Air? ALL Two Fish Dive Resorts and Dive Centres cater for underwater photographers with fresh water on the boats, rinse tanks, plenty of power points for charging and friendly teams who love to check out your images!
To make a reservation or for more information about diving in the Lembeh Strait (or elsewhere in Indonesia), fill out the contact form below and we’ll get right back to you.